This is the last post in my NPIP Certification series. In this post I get into the knitty gritty of actually testing your flock for pullorum. You will still have to become a certified tester for the results to be considered, but this will give you an idea of what is involved before deciding to take a certification class.
The test I will be describing is called the whole blood plate test. The whole blood plate test is a test where a blood sample is taken from each bird and mixed with an antigen to see if a reaction occurs.
You will need some equipment to perform the test.
1. A light box ($65 -$100)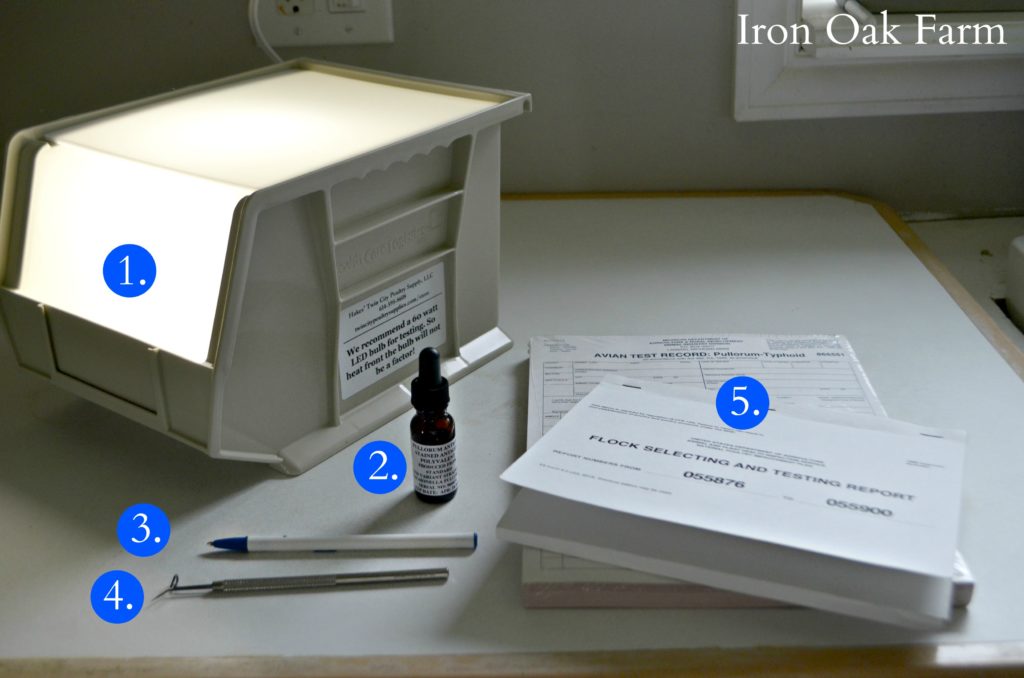
Our box is made of plastic with a translucent fiberglass plate. Inside there is a light outlet. This helps you to see the results properly. Light boxes can be found where poultry testing supplies are sold, or there are plans to make your own online.
2. Antigen ($80 – $150)
The antigen comes in a bottle filled with dyed liquid containing dead Pullorum bacteria, or Mycoplasma gallisepticum (MG). The dye helps you to see the reaction or agglutination (clumping) of the bacteria if there is a positive reaction. This should be refrigerated when not in use.
3. Pen- For keeping records
4. Bleeder and Loop ($2-$20)
You will need something to prick the bird. Testing supply companies sell a combination bleeder and loop, but we found that a 22 gauge needle worked better. The vein seems to roll under the loop/bleeder tool.
The loop is meant to pick up the correct amount of blood to mix with the antigen.
5. Record forms provided by the state
Leg bands – For birds that test positive
A pail of water and paper towel – For cleaning between birds
Timer
How to Test
It’s better if you can have someone help you while performing this test. One person to hold the chicken while the other takes the blood sample.
Always practice bio-security if entering other people’s coops.
- Plug in your light box near the area you will be working.
- Drop 1 drop of antigen solution onto your light box plate. This will test 1 chicken.
3. 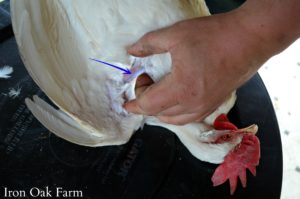 Hold the chicken on its back with the wing extended. Where the wing meets the body, there is a large vein that runs down the largest part of the wing. You may have to pluck some of the downy feathers to see it.
4. 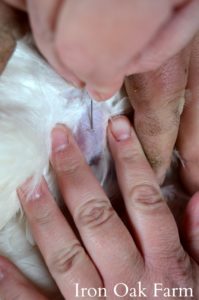 Insert the needle into this vein. I find that holding the needle perpendicular to the vein seems to draw blood the quickest and causes less bruising. You may be surprised as to how much blood comes out.
5. 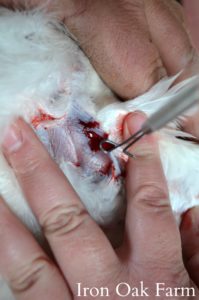 Where the blood pools, take the loop tool and collect a loop-full of blood.
6.  Mix the blood with the drop of antigen on the plate until evenly mixed.
 Set the timer for 2 minutes.
If after 2 minutes there is no reaction, that bird is negative and you can test the next chicken.
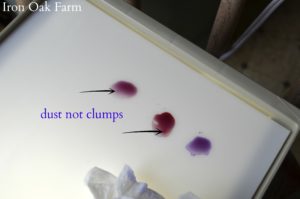 A positive reaction will appear as clumping of the dye. The clumps will pull the coloring from the original circle of the drop so you’ll have clear spots and deeper blue/purple spots.
The examples to the right are all negative. Try to keep your plate clean as not to confuse dust particles with clumping.
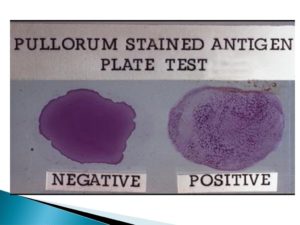
Photo Credit: http://slideplayer.com/slide/12521358/
If you get a positive reaction. You should test from the other wing. If this is negative, then the bird can be considered negative. If it’s positive, then the bird will need to be sent for further testing.
Positive birds should be leg banded and separated from the rest of the flock.
The whole test is quite simple, albeit cumbersome to try and hold the chicken while you prick it. But being able to perform this test can save you money when certifying your flock, and can open up opportunities to make money providing the service for others.